Posted on

How to Clean and Replace Your Oven Racks

How to Clean and Replace Your Oven Racks

Find out the best ways to clean your oven racks!

Cleaning your oven racks, which can accumulate grease and grime over time, is crucial to minimizing fire risks and enhancing your oven’s smell and appearance. This guide will navigate you through the three best cleaning methods for your oven racks, which include using soap and water, a spray cleaner, and a combination of baking soda and vinegar. These methods are proven and effective, but you can choose whichever is most convenient for you. We’ll also address common questions about oven racks, to help you better understand this cleaning process, and to help you get your racks shiny again!

Why and How Often You Need to Clean Your Oven Racks

Oven racks are removable metal shelves installed within your oven that support food items, containers, and trays, so they have a supporting platform to cook and bake on. Your oven racks will eventually get covered with grime and grease, and either need to be cleaned, or replaced. Neglecting to clean your oven racks will result in food residue buildup that can increase a fire risk, and create hard-to-remove odors. That is why we recommend cleaning your oven racks with this guide at least once or twice a year, or more frequently, based on your oven usage. This will help maintain their condition, prevent replacement, and enhance your comfort.

Best Ways to Clean Oven Racks

Cleaning your oven racks is easy and can be done quickly and effectively, whether they’re only slightly grimy, or heavily greased. The best methods for cleaning oven racks are either in a bathtub or large container, or outside in a large plastic bag. These options minimize mess and hassle compared to using a sink, but a sink can also be used if a tub or outdoor cleaning option doesn’t suit your set-up. Regardless of whichever cleaning process suits you better, we have the guides to assist you.

How to Clean Oven Racks in a Bathtub

The most common recommendation from experts is cleaning oven racks in the bathtub, as it allows for ample space and water to thoroughly clean them, without all the mess. But if you do not have access to a bathtub, a large container can serve as an effective alternative for cleaning your oven racks. We have a list of all the supplies you’ll need, along with instructions to explain how to make sure they’re effectively cleaned.

Everything You Need:

  • Bathtub or Large Container
  • Warm Water
  • Dish Soap/Detergent or Dishwasher Tablet
  • Towels
  • Non-Abrasive Sponge or Brush

Step-by-Step Guide:

  1. If you’re using a bathtub, spread towels at the bottom of the tub to ensure it doesn’t get scratched by the racks.
  2. Place your oven racks inside the bathtub or large container.
  3. Fill the bathtub or large container with warm water and pour dish soap/detergent or place a dishwasher tablet in the water.
  4. Agitate the water to ensure the soap or tablet dissolves properly.
  5. Leave the racks to sit in the soap and water for a few hours, or overnight if possible.
  6. Once the racks have soaked for that extended period of time, drain the water from the tub or container.
  7. Rinse the racks with warm, clean water, and scrub them with a sponge or brush.

How to Clean Oven Racks in Plastic Bags

Using a large plastic bag to clean your oven racks offers a convenient and efficient way to clean your oven racks. By using plastic bags and a spray aerosol cleaner, you save water, avoid a messy cleanup, and still get clean oven racks. The plastic bags are used to help seal the cleaner to the oven racks and ensure it stays wet for a longer period, which improves its cleaning power and prevents it from dripping off. We’ll provide you with a comprehensive list of the supplies you’ll need, and step-by-step instructions to make it as easy and hassle-free as possible.

Everything You Need:

  • Trash Bag(s)
  • Non-Abrasive Sponge or Soft-Bristle Brush
  • Latex/Rubber Gloves
  • Spray/Aerosol Cleaning Product of Choice (Easy-Off, for example)
  • Clean Water
  • Dish Soap

Step-by-Step Guide:

  1. Make sure you are outside your home, and in a well-ventilated area.
  2. Put the oven racks in their own respective bag.
  3. Spray each rack liberally with a specialized oven cleaning product of your choice.
  4. Ensure each rack is completely covered, and then close the bags and allow them to sit for 30 minutes to an hour, flipping them over halfway through.
  5. After the hour is up, remove the oven racks and scrub them with a non-abrasive sponge or brush, and then wash the grease and gunk off with clean, soapy, warm water.

How to Use Baking Soda and Vinegar to Clean Oven Racks

If you want to clean your oven racks using all-natural ingredients and without the harsh chemicals and fumes of some spray cleaners, you can use the more natural solution of baking soda and vinegar to help break it down. Using a baking soda and vinegar combination together can act as a mild abrasive and acid, which makes cleaning tough grime and grease stains with a sponge or brush easier. Below, we’ll detail everything you need, and all the required steps to get the rest of the mess off.

Everything You Need:

  • Bathtub or Large Container
  • Baking Soda
  • Vinegar
  • Bowl
  • Paint Brush (or something similar)
  • Non-Abrasive Sponge or Brush
  • Warm Water
  • Spray Bottle (Optional)
  • Towels (Optional)

Step-by-Step Guide:

  1. If you’re using your bathtub, ensure you place towels down before you put your oven racks down.
  2. Place your oven racks in a large container or bathtub.
  3. Create a paste with equal parts baking soda and water (a half cup of each will work) in a bowl.
  4. Use a brush to coat the racks with the paste, and allow it to sit for 30-45 minutes.
  5. After that time, create a mixture of equal parts vinegar and water, and spray or slowly pour it over the racks.
  6. Allow the racks to sit for another 30 minutes.
  7. After 30 minutes, rinse the racks with clean water, and then scrub them with a soft brush or non-abrasive sponge and warm, soapy water.
  8. Rinse the racks a final time, and allow them to dry.
Posted on

What does an LG Washer ‘CL’ Code Mean?

What does an LG Washer 'CL' Code Mean?

Turn off the control lock, and get back to washing!

If your LG washer is flashing a ‘CL’ code, it signifies that the ‘control lock’, also known as the ‘child lock’, is turned on. This ‘CL’ code is not an error, but a notification that the control lock is active, causing the control panel buttons and dial, except the power button, to be unresponsive to inputs or changes. The control lock is important because it prevents accidental washer use, especially by children. In this article, we’ll explain how to activate and deactivate this lock for front and top-load washers and provide steps on how to reset your LG washer if you have difficulties deactivating the ‘CL’ code.

It is worth noting that LG washers, dryers, and dishwashers share the ‘CL’ code between them. This means the process of turning the control lock on or off works the same way, and the following guide can be used to resolve any issues with any of them. If you need to reset your LG washer, dryer, or dishwasher, you can also use the same set of instructions to do so.

How to Turn On and Turn Off an LG Washer Control Lock

There is no difference in the activation process for top-load and front-load LG washers, but instead, it depends on whether you have a single or double-button control lock model. In either case, we’ll explain how to activate and deactivate the control lock, so you can get back to washing your clothes.

Turn On and Turn Off an LG Washer Control Lock with a Single Button

If you own an LG washer with a single, designated control lock button, the activation and deactivation process is quite straightforward. If you’re unsure whether your model is a single or double-button model, use your owner’s manual to identify which you have.

  1. To activate the control lock, locate the designated control lock button, and hold it for 3–5 seconds to turn it on.
  2. A chime should sound, and a ‘CL’ code will begin to flash on the display, as well as the remaining cycle time if a cycle was started. On some LG washer models, a small lock icon with a smiley face will appear. Note: If you turn the lock on during a wash cycle and fail to deactivate it before the cycle completes, the lock will remain on even after the washer turns off.
  3. To turn off the control lock for your LG washer, hold the same button for 3–5 seconds. Another chime should sound, and the ‘CL’ code will disappear from the display.

Turn On and Turn Off an LG Washer Control Lock with Two Buttons

If your LG washer has two ‘Control Lock’ labelled buttons side-by-side instead of one, use those to turn the lock on or off. If the buttons aren’t labelled, or you’re unsure which buttons to press, use your owner’s manual to help you identify which buttons you need to use.

  1. To activate the control lock on your washer, identify which two buttons are used to activate it.
  2. Hold the two buttons you’ve identified for 3–5 seconds to activate and turn on the control lock. A chime should sound, and a ‘CL’ code should appear and begin flashing. For some models, a small lock icon with a smiley face will appear until the lock is turned off. Note: If you activate the lock during a wash cycle and you do not turn it off before the cycle ends, the lock will remain on even after it ends and the washer turns off.
  3. To turn off the control lock, hold the same buttons used to turn on the lock for 3–5 seconds. A chime should sound, and the ‘CL’ code and any lock symbols will disappear.
Posted on

Why Your Refrigerator Compressor is Getting Hot

Why Your Refrigerator Compressor is Getting Hot

Common Causes and Fixes for an Overheating Compressor

The compressor is a crucial part of the refrigeration cycle, which is the process whereby heat is removed from inside the refrigerator to keep it cool. The compressor pressurizes the refrigerant gas, which is converted into a liquid when it passes through the condenser coils. The liquid evaporates and absorbs heat from the interior of the fridge and cools it down. The cooled air is then circulated throughout the refrigerator to keep the food items cold. The gas returns to the compressor where it begins this cycle again. In summary, the compressor is responsible for pressurizing and circulating the refrigerant throughout the refrigeration system and facilitating the removal of heat from inside the refrigerator to the outside environment.

If the compressor overheats, it may be unable to compress refrigerant gas effectively, resulting in reduced cooling capacity and longer cooling cycles. It will also consume more energy as it struggles to maintain the desired temperature inside the refrigerator. This can lead to higher electricity bills and unnecessary energy use. Furthermore, overheating over a long period of time can damage the internal components of the compressor, such as the motor windings, and electrical connections. Over time, this can lead to premature compressor failure and the need for costly repairs. If the compressor continues to overheat, it may eventually fail completely. A failed compressor can cause the entire refrigeration system to stop working, leaving your refrigerator unable to function at all. Therefore, if you notice that your compressor is getting hotter than usual, you should address this promptly.

How Dirty Refrigerator Condenser Coils Lead to a Hot Compressor

The condenser coils are designed to release heat generated from inside the refrigerator. When these coils are covered in dust, dirt, or debris, they will be unable to carry out this function efficiently and the overall temperature of the refrigeration system increases. As a result, the compressor has to work harder and run more frequently to maintain the desired internal temperature. Over time, this constant strain can cause the compressor to overheat, increase energy costs, and lower the overall efficiency of the refrigerator.

How to Clean Condenser Coils to Fix a Hot Compressor

  1. Before you begin cleaning, unplug the refrigerator from the power outlet to avoid electric shock.
  2. You can typically find the condenser coil either on the back of the refrigerator or underneath the door behind a grille.
  3. If the coils are at the bottom, you may need to remove the access panel or grille covering them. This may involve unscrewing a few screws or simply snapping off the grille, depending on your refrigerator model.
  4. Once you have access to the coils, use a coil cleaning brush or a vacuum cleaner with a brush attachment to remove any dirt or debris. Be careful to avoid damaging the coils.
  5. For any hard-to-reach areas where dust may accumulate, you can use a narrow brush or a can of compressed air to reach these areas.
  6. Once the coils are clean and you’ve inspected them for damage, reassemble any panels or grilles you removed and plug the refrigerator back into the power outlet.
Posted on

Are Dehumidifiers Supposed to Blow Hot Air?

Are Dehumidifiers Supposed to Blow Hot Air?

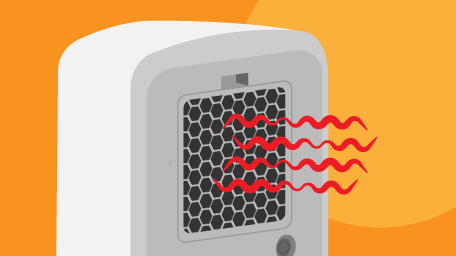
The short and simple answer is yes, dehumidifiers are designed to blow air into your home that can be slightly warmer than your room’s ambient temperature, which may somewhat increase the overall temperature and make it feel warmer. A dehumidifier works by pulling moist air over its evaporator coils and cooling it into water droplets. These water droplets are then collected in a bucket that you empty or that drain automatically through a hose. The leftover air is then pulled over the condenser coils, which reheat it and release it back into the room. Dehumidifiers also partly produce heat as a result of their normal operation, but if your dehumidifier is blowing air that’s too hot into your home, that’s when there’s an issue.

Within most dehumidifiers are four key parts that allow it to function, each as important for its operation as the next. These four parts are:

  • Compressor: The compressor is the heart of a dehumidifier, as it is what circulates and compresses a liquid and gas called ‘refrigerant’ throughout the entire system, including the evaporator and condenser coils. Without a compressor, there is no moisture removal or proper heat exchange.
  • Evaporator Coils: The evaporator coils are what initially absorb the hot air from your home and cool it down, so the moisture it carries condensates and turns into water droplets that are collected or drained away.
  • Condenser Coils: The condenser coils release the heat absorbed by the refrigerant in the evaporator coils, and condense the refrigerant back into a fluid so it can cycle back to the evaporator coils and absorb more heat.
  • Fan: The fan in a dehumidifier is responsible for moving air throughout it, which is essential to the air being pulled in, cooled over the evaporator coils, and pushed back out into your home.
Posted on Leave a comment

How to Clean a Bosch Dishwasher

How to Clean a Bosch Dishwasher

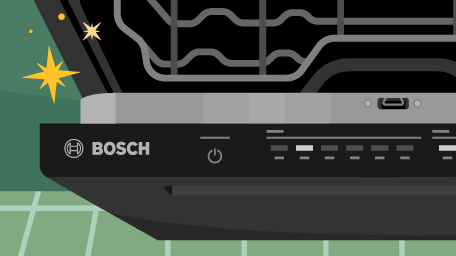
The exterior or outer panel of the dishwasher can accumulate dust, dirt, and food splatters. Regular cleaning helps prevent the buildup of grime and reduces the risk of bacteria growth. It also prevents corrosion and deterioration of the exterior surfaces, ensuring your appliance remains in good condition for years to come. A clean exterior can also enhance the overall appearance of your kitchen!

  1. Ensure the dishwasher is turned off and unplugged before you start cleaning.
  2. Prepare a cleaning solution by mixing dish soap with warm water.
  3. Dip a cloth or sponge into the soapy water and wipe down the door panel of the dishwasher, focusing on any dirty spots or fingerprints.
  4. Use a lightly dampened cloth to wipe the control panel as well and gently clean around the buttons. Be careful not to use excessive water.
  5. Once you are done, rinse the area with a damp cloth to remove any residue.
  6. Dry the surface and ensure there is no moisture left.
  7. If your dishwasher has a stainless steel exterior, apply a stainless steel cleaner or a mixture of white vinegar and water and wipe in the direction of the grain to avoid streaks and create a smooth, glossy finish.